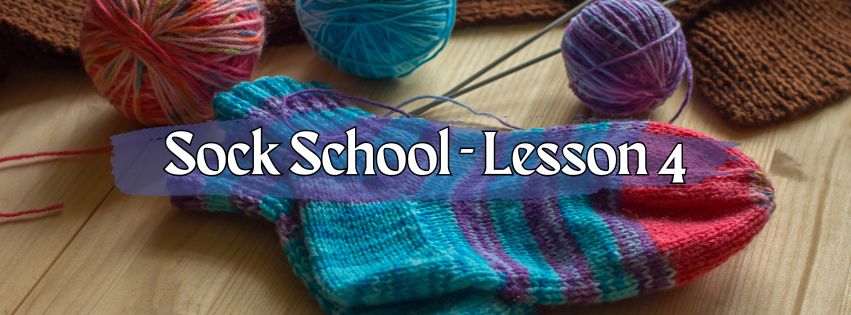
Sock School - Lesson 4: Socks with Heels
If you've completed Lesson 3, you'll have a pair of socks! If you've just skipped ahead, that's ok, too. There are plenty of reasons you might have, and they're all fine. Reading all instructions before getting started is always a good idea. Or maybe you already know what was covered until now, and you want to learn how to make a heel.
Parts of A Sock
It may seem weird that we're not covering this until the fourth lesson of the series, but it really hasn't been relevant until now. The banana socks don't have all these parts.

Specifically, the banana socks don't have a heel. The cuff and the bottom aren't defined in the construction, they're defined by the foot the sock is worn on.
On a more standard sock, the heel defines the length and position of the cuff and the bottom. The heel begins where the cuff ends, and the bottom of the sock/the foot starts where the heel ends.
The Cuff
For this basic sock, we will make a simple 2x2 ribbed cuff. There are lots of other options you can experiment with in future pairs. Since the focus of this lesson is the heel, we can go fancy on the cuff later.
To start, we'll cast on 40+1 stitches, and join in the round, just like with the banana socks. (If you need a refresher on this, you can refer back to Lesson 2.) To create the ribbing knit 2, purl 2, and repeat this throughout the round. Continue this for 10 rounds.
Now you'll have a basic cuff for a sock.
The Heel
There are many different heels for knitted socks. The one I use, the flap and gusset heel, is the one most commonly used in basic knitted socks in Finland. And since Finland has the highest number of knitters per capita in the world, I have a feeling they know what works well.
Setup
To set up for the heel, knit 10 stitches from the beginning of the round, and turn the work. Slip the 1st stitch, then purl 19 stitches (you'll be going back in the other direction) onto one needle.
These are the stitches you will be making the heel with, the remaining stitches will be left waiting for a later step.
The Back
To create the back of the heel, we're going to work a reinforced stitch pattern as follows:
Row 1 (RS): *Slip 1, knit 1*, and repeat from * to * until the end of the row, turn the work
Row 2 (WS): Slip 1, purl all the stitches to the end of the row, turn the work.
Repeat rows 1 and 2 until you have a total of 20 rows (the same number as stitches across).
The Turn
Next, we need to turn the heel: make the fabric bend from the back of the heel to the bottom of the foot. This is achieved with a series of decreases.
- Work the same reinforced stitch pattern as on the back of the heel for 13 stitches (until 7 stitches remain), make a ssk-decrease, and turn the work.
- Slip 1, purl 6 (7 stitches remain on the left), purl 2 together, turn the work.
- *Slip 1, k1* for a total of 7 stitches, make a ssk-decrease, turn the work.
Repeat steps 2 and 3 until the stitches on the sides run out (you'll work row 2 last). The spot where the decreases are made will be across the gap that forms next to the previous decrease. The middle set of stitches will remain the same number, 8 in this case.
The final step is to knit 4 stitches so the working yarn is in between the 8 remaining stitches. This will be the beginning of the round.
Picking Up The Sides
At this point you'll see that you have quite a gap before the life stitches we left waiting. To bridge this gap, you will need to pick up 10+1 stitches from the sides.
Wait
What's with the +1 counting again, you ask? I'll tell ya: 10 of the stitches are from the slipped stitches on each row of the back of the heel, and the +1 is a stitch that will be picked up between those and the live stitches so that there isn't a hole on the side of the heel.
Why not just say 11 stitches? Because this process is formulaic. The number of stitches used for the heel is generally half of the stitches for the cuff. The height of the heel is the same as the number of stitches in the heel. For the turn, the heel stitches are divided into thirds. The number of stitches picked up is half the height of the heel + 1.
OK, back to the sock
So how do you do this? There are several spot of the stitch where it can be picked up, but I'm going to show you my preferred method (skip to minute 6):
I pick up the leg of the stitch from the inside of the edge. This pulls the visible stitches just a bit tighter, and creates a clean look on the outside of the sock.
We Have A Heel!
The picked up stitches are knitted through the back loop. This also tightens them up nicely. The stitches in between the picked up ones, the ones that had been left waiting, are knitted normally.
Once you get back to the beginning of the round you'll have 50 stitches on the needles. If you're using four DPNs, the first and third needles will have 15 each, and the second and third needles will have 10 each. If you're using FlexiFlips or Magic Loop with circular needles, a stitch marker between these sets of 15 and 10 will be helpful.
The Gusset
In sewing, a gusset is an extra piece of fabric that's added to the garment. In a sock like this it's created as we work our stitch count back to the same number we started the sock with. Like this:
At the end of the fourth needle (or before the first stitch marker) knit 2 together. At the beginning of the fourth needle (or after the second stitch marker) make a ssk-decrease.
Make these decreases every other round until you're back down to 40 stitches (so a total of 5 times). From here, you can continue knitting stockinette until the foot is long enough.
The Foot
How long is long enough?
The best answer is "once the pinky toe is covered", but this only works if you have the foot available.
Forty stitches with Aran-weight yarn will make approximately an US kids' size 5.5 (EU size 22) sock. For this size, the length from the back of the heel to the beginning of the toe is 4.4.5 inches (11.5 cm).
From here, you can knit the toe of your choice. If you need to refer to the instructions used in the banana socks, you can find them in Lesson 3.
And You're Done!
Well, once you make a second sock the same way.
Now you have a pair of socks with a flap and gusset heel.
The process is the same for all other size socks, with all other yarn weights. The only difference is the number of stitches.
The Sock Cheat Sheet
I have put together a Sock Chart that gives you all the necessary stitch counts for each step based on sock size and yarn weight. You can use the form below to sign up for my newsletter list, and I'll send you a copy.
Please let me know how your socks turn out! You can comment here, or tag me with @FinnishedKnits on Instagram.


